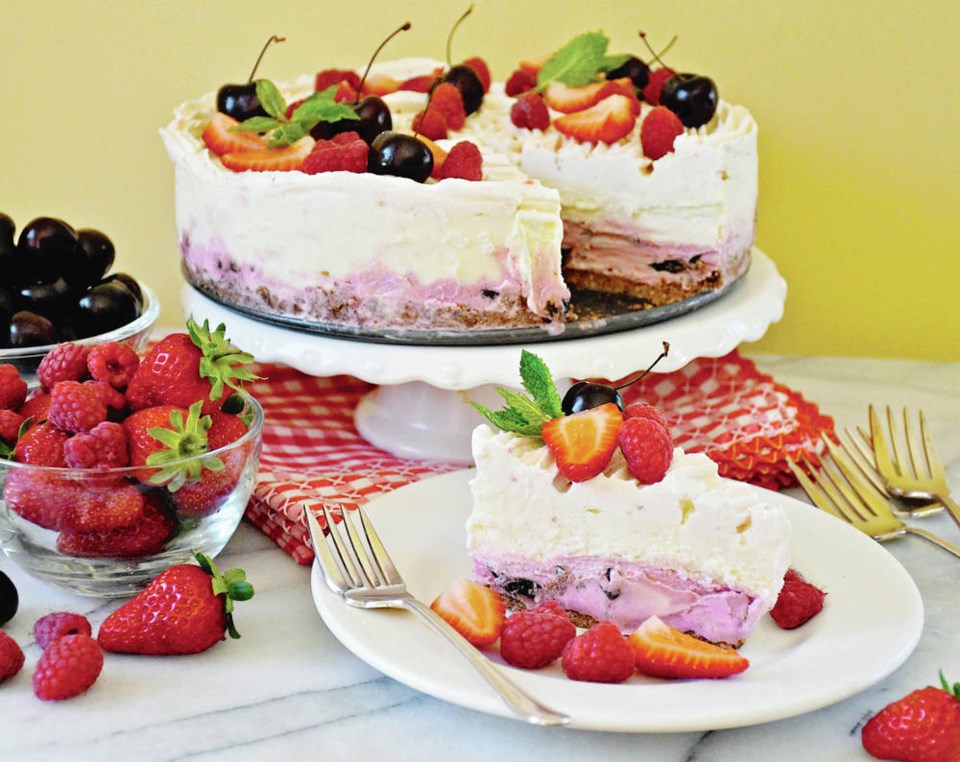
If you need a cake for a summer gathering, but don’t want to fire up the stove, make sure your freezer is functioning correctly. That’s because you’ll need it to make a dessert that requires no baking at all, an ice cream cake.
It’s not difficult to make, but it does require a little patience as you wait for the various layers of the cake to freeze solid.
In my recipe the process begins by making a graham cracker crust for the cake in a spring-form cake pan. Once that crust has been frozen solid, you top it with a layer of flavoured, softened at room temperature, ice cream, which in my recipe could be cherry or strawberry.
The cake is then set back in the freezer and when the ice cream is frozen solid again, you top it with a second layer of softened ice cream, in this case vanilla. The cake goes back into the freezer again, and when the vanilla ice cream is frozen solid again, the cake is topped with a layer of whipped cream flavoured with a bit of jam.
The cake goes back into the freezer again and when the whipped cream is frozen solid, it’s ready to serve. You can make the cake a day or more in advance, and have it sitting in your freezer at the ready when you need it.
I served the cake with sa���ʴ�ý cherries and berries, creating a pretty splendid summer dessert all ages will enjoy.
Ice Cream Cake with sa���ʴ�ý Cherries and Berries
Two layers of ice cream sitting on a graham cracker crust, finished off with a layer of jam-flavoured whipped cream. The cake is served with sa���ʴ�ý cherries and berries, creating a splendid summer dessert.
Preparation time: 30 minutes plus freezing time
Cooking time: None
Makes: 10 to 12 servings
1 1/4 cups graham cracker crumbs
1/4 cup butter, melted
1 Tbsp granulated sugar
1 Tbsp cocoa powder
1 litre (about 4 cups) cherry or strawberry ice cream
1 litre (about 4 cups) vanilla ice cream
1 (227 mL) container whipping cream
2 Tbsp strawberry, cherry or other red-coloured jam
• fresh sa���ʴ�ý cherries and berries, such as strawberries, raspberries and/or blueberries, to taste
• mint sprigs, for garnish
Place the graham cracker crumbs, butter, sugar and cocoa powder in a bowl and mix well to combine. Spoon, spread and firmly press this crust mixture into the bottom of a 9-inch, spring-form cake pan (see Note). Set the pan in the freezer until the crust is frozen solid, about 20 minutes.
Let the cherry (or strawberry) ice cream sit out at room temperature to soften 10 to 15 minutes. Using an ice cream scoop, set scoopfuls of that ice cream into the cake pan. Use a heavy soupspoon or spatula to spread and firmly pack the ice cream into an even layer in the bottom of the pan. Put the pan back in the freezer until the ice cream is frozen solid again, about 30 minutes.
Let the vanilla ice cream sit out at room temperature to soften 10 to 15 minutes. Set scoopfuls of that ice cream on top of the cherry (or strawberry) ice cream in the cake pan. Use a heavy soupspoon or spatula to spread and firmly pack the ice cream into an even layer. Put the pan back in the freezer until the ice cream is frozen solid again, about 30 minutes.
Place the whipping cream in a bowl, or bowl of your stand mixer, and whip until soft peaks form. Add the jam and beat until stiffs peaks form. Pipe or artfully spread the whipped cream on top of the ice cream cake. Put the cake back in the freezer, and freeze until the whipped cream is frozen solid, about 30 minutes. Tent the cake with plastic wrap and keep frozen until ready to serve. The cake can be made a day or more in advance.
To serve, dip a thin, sharp knife in very hot water and then wipe it dry. Run the knife around the outer edge of the pan. Unlock and remove the cake pan’s outer ring. Dip your knife in very hot water again and wipe it dry. Cut the cake into wedges, making sure you cut all the way through the graham cracker base. Now use a cake lifter to set those wedges of ice cream cake on chilled dessert plates. Garnish each serving with cherries, berries and a mint sprig, and then serve immediately.
Note: When putting your spring-form cake pan together, make sure the base of the pan is lip-side-down. The lip being the slightly raised ring of metal around the edge of the base. Putting the base that way will make it easy for you to slide your cake lifter under the crust of the cake and pull out clean wedges of it.
Eric’s options: If presenting the cake at the table as I did in the recipe photograph, for a pretty look, before slicing and serving it, decorate the top of the whole cake with some cherries, berries and mint.
Eric Akis is the author of eight cookbooks. His columns appear in the Life section Wednesday and Sunday.


